
What’s the best solution for grinding on the drive side?
Quick answer: Yes, you can grind on the drive side.
I’ve been in the BMX space for 25+ years, so I’ve been grinding on the (right) drive side with both large and small sprockets (before left-hand-drive rear hubs were invented).
And the right side is my dominant grind side.

I still remember how happy and excited I was when I got my first left-hand drive cassette.
I first rode two pegs, then three, and eventually started riding four.
So, with four pegs, you can’t avoid grinding on the drive side.
Usually, that will be the opposite side, but hey, if you have four pegs, you want to use all of them.
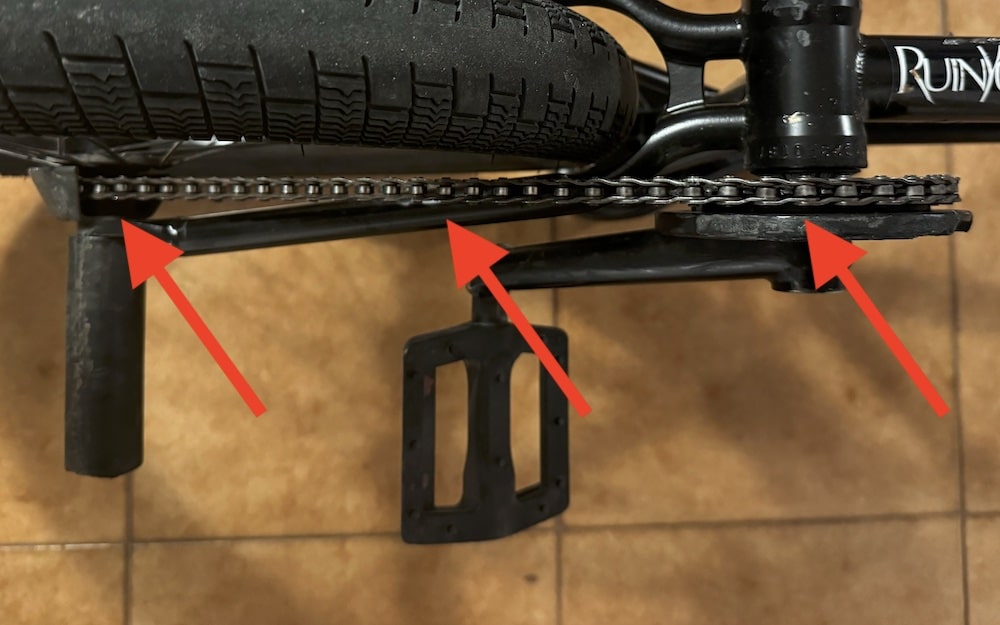
While you could not avoid hitting your sprocket, chain, and rear cog in the past, it’s pretty simple to protect all three these days.
Snapped chains and bent sprockets suck!
But that doesn’t have to happen anymore.
Let’s keep your grinds smooth and your bike rolling strong with a few simple tweaks!
This post covers:
- Best solutions for drive side grinding
- Common mistakes riders make
- Conclusion: grind on drive side with ease!
Best Solutions For Drive Side Grinding
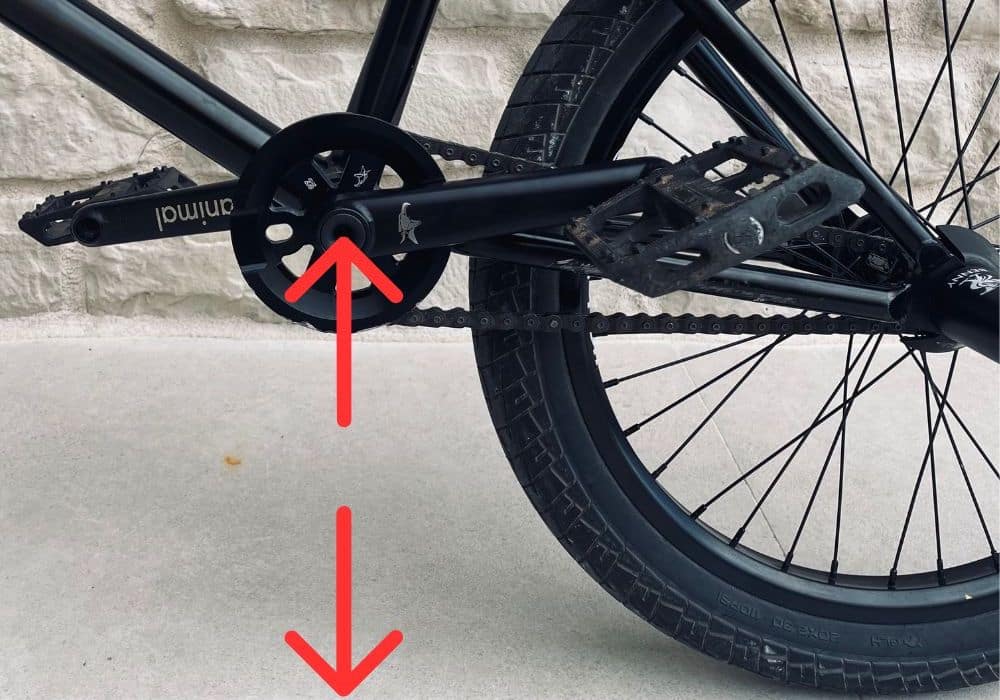
1. Use A Smaller Sprocket

When you shrink the size of your sprocket, you give yourself more ground clearance.
That means less chance of your sprocket or chain hitting the ledge or rail while you grind.
You’ll slide more smoothly and with fewer worries about wrecking your drivetrain.
As for sizes, anything around 25T or 28T is good.
Smaller sizes like these are perfect for giving you that extra clearance without sacrificing too much of your pedaling efficiency.
(If you need a bit more speed, I suggest you go with a 28T sprocket.)

I rode a 28T sprocket for a very long time but switched to a 25T because I think it looks better and for better grind clearance.
Also, I don’t need the speed because my riding style is more technical.
Further reading:
2. Use A Sprocket With A Guard
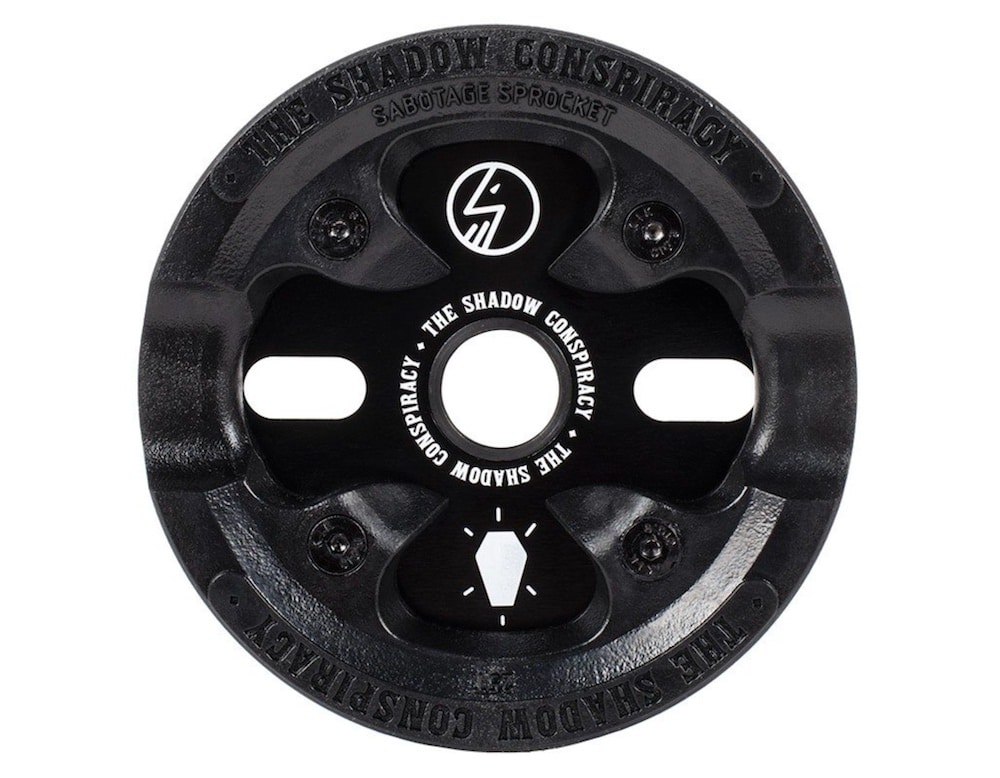
Next, let’s look at sprockets with a guard.
If you’re serious about grinding on the drive side, you need one of these in your setup.
A guard acts like a shield for your BMX chain and sprocket. You can opt for sprockets with built-in metal guards or removable plastic ones.
I prefer the latter.
Some popular options are the Shadow Sabotage Sprocket (the one I currently ride) or the Odyssey La Guardia.
Both provide great protection, but the first has a plastic guard, and the second a metal one.
3. Use A Drive Side Hub Guard
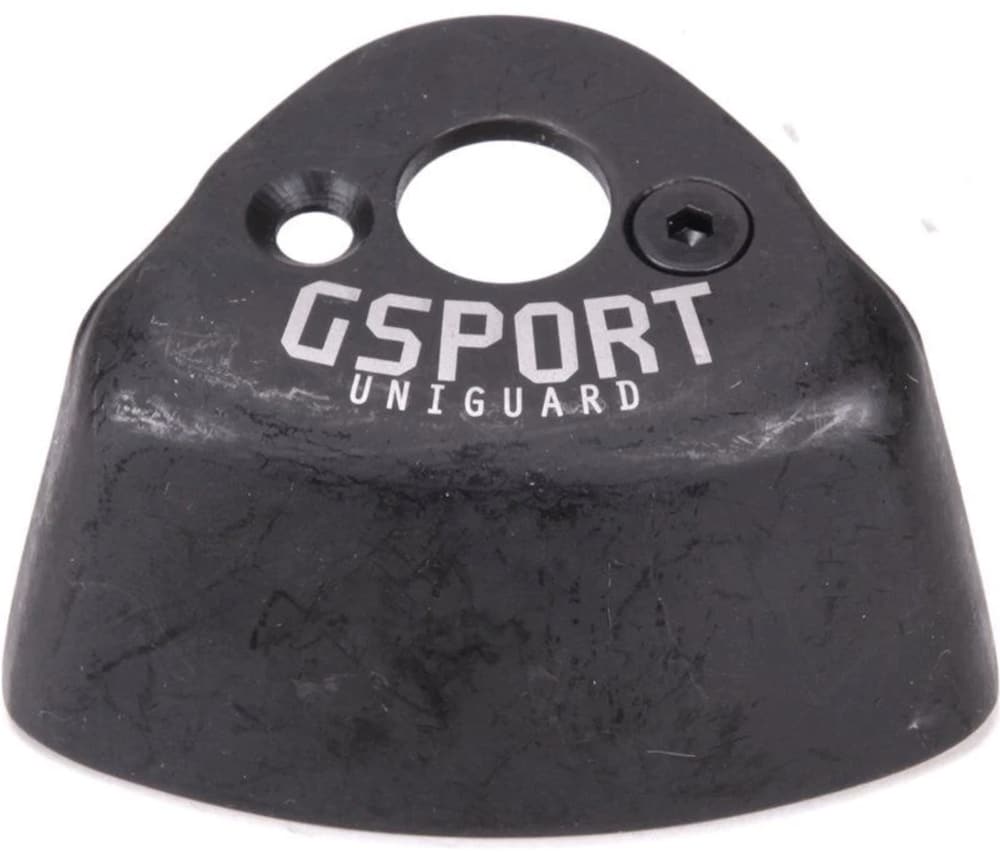
A drive side hub guard is another must-have.
This little piece of material is a lifesaver when protecting your driver and spokes.
The way it works is simple: the hub guard covers the drive side of your rear hub, creating a buffer between your spokes/driver and whatever you’re grinding on.
Without it, one bad grind could snap a spoke or damage your driver and chain.
When I first put on the drive side hub guard on my bike, everything changed.
I will never remove it!
There are some solid options like the GSport Uniguard or the Kink Universal Driver Guard (both work with any hub!).
They’re durable, easy to install, and will save you from some serious hub damage.
For more options, check my list of the best BMX hub guards (front and rear).
4. Know Your Frame Geometry & Bottom Bracket Height
Finally, let’s talk frame geometry — specifically, bottom bracket height.
A higher bottom bracket gives you more clearance during grinds.
The idea is simple: the more your drivetrain is lifted away from the rail or ledge, the less likely it is to take a hit.
It’s one of those small adjustments that can make a big difference when you’re grinding on the drive side.
If you’re looking for a frame, look for one with a higher bottom bracket. Something around 11.7″ to 11.9″ works well for this.
The Cult Biggie frame or the WTP Doomsayer frame are solid examples of frames with good bottom bracket height for grinding.
With these upgrades and tweaks, you’ll be set to grind without worrying about smashing up your drivetrain!
Common Mistakes Riders Make
Even the best riders make slip-ups when setting up their bike for drive side grinding.
Here are a few common mistakes to avoid:
- Not using proper guards: Skipping a hub or sprocket guard is a quick way to wreck your drivetrain. A small investment in guards can save you from serious damage. But it’s not only about making the damage – hubs also make grinds smoother.
- Overlooking sprocket size: Sticking with a large sprocket limits your clearance for grinds. Go smaller – like 25T or 28T – for more space.
- Ignoring frame geometry: Don’t forget about bottom bracket height. A higher bottom bracket gives you better grind clearance, so choose wisely if grinding is your thing.
Need new pegs?
Check out:
Conclusion: Grind On Drive Side With Ease!
If you’re looking to master drive side grinding without wrecking your bike, there are a few key moves to make.
Start with a smaller sprocket to give yourself some extra ground clearance, and grab a sprocket with a guard to protect your chain from getting bashed.
Don’t forget a drive side hub guard – it’s a lifesaver for your spokes, driver and chain.
And finally, pay attention to your frame geo, especially the bottom bracket height, to get that perfect grind clearance.
As a final tip, ensure you regularly check your drivetrain after grinding sessions.
Stay on top of it, and you’ll keep your bike running smooth and your grinds looking clean AF!
Go out there and shred without fear (of damaging something ).
Further reading:


